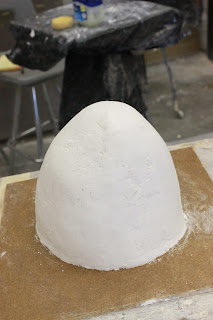
We sculpture an animal using a fine grain clay, really simplifying the shape of the animal. We then covered it in purple silicon, then in plaster, making this lovely mold. The purpose of the mold is to be able to easily reproduce the sculpture.
Now we are cracking the mold in half.
cracking...
Voila! It has been released! Yup, that's my bunny.
This is Cassi's Canadian Lynx. After we removed the plaster, we are now cutting the sculpture out of the silicon by cutting it down the center.
This is Geddes's raccoon. When the silicon is remove, the sculpture is safe inside! Remove the sculpture and the negative space is where you pour the plaster in reproduce the same exact sculpture.
Now to make the plaster sculpture!
This is yummy yummy plaster!
In the foreground is the silicon/plaster mold wrapped with giant rubber bands to secure it in place.
Place the mold where it is secure upside down. Pour the plaster in and let set for about an hour.
Voila! You have a lovely plaster sculpture!


Wow! That's a really neat process! Not to mention your bunny turned out beautifully!
ReplyDelete